As best band saw reviews already mentioned, there are several saws can do the resawing. However, it is not easy for making resawing, hence, in this article, we share some tips for you to set up and step by step operating the band saw to create a perfect resawing.
Tip 1: Select a RIGHT BLADE
A 3-4 tpi (teeth per inch) with gullets of the large size is highly recommended for its creating the quietest and smoothest resaw blade.
Tip 2: Maintain a suitable blade tension
To keep stock centered, it is important to make an appropriate blade tension. On the saw, install a blade of Wood Slicer. To prevent the bearings from contacting the blade, thrust them opened up and back off not only above but also below the table.
With the unplugged saw, between the lower and upper wheels, start cranking on some tension, give a poke of sharp sideways on the blade at about a half of the way by the index finger. On the upper wheel, track the blade to make the gullet’s deepest part focus at the tire centerline.
Tip 3: Get the blade guides adjusted
Get the covers of wheel closed, get the saw plugged in, and turn the saw on. Adjust the speed at a full rate to make the blade track perfectly.
In case the blade is blurred by the vibration, slightly decrease or increase the tension to make the blade smoothly operate in a quiet and straight line. Similarly, you can make the cuts smoother and help the saw operate more effectively by eliminating the fluttering process in the kerf.
Get the thrust bearings and lateral guides nearer to the blade.
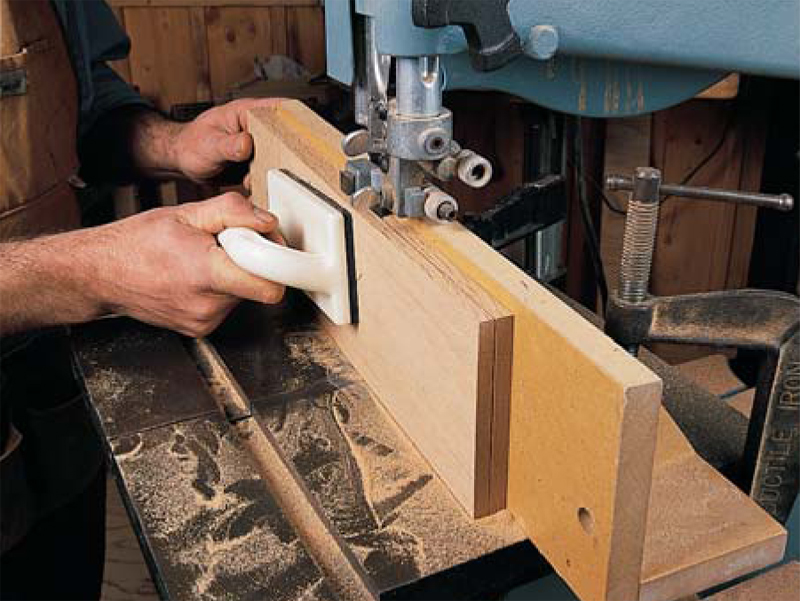
Tip 4: Using a point block to get your workpiece steered
A point block fence is encouraged to use when there is only 1 or 2 pieces being resawed. Concretely, a curved fence of appropriate height can make the stock upright while the direction of feed is left by hand.
On the stock, make a cut line long enough, get the point to block to achieve your desired width.
Remember to adjust the direction of feed when you freehanding the cut.
5. Get the fence adjusted
In case you resaw 3 or more pieces, make a straight fence and predictable and accurate cuts.On the sawtable, draw an easily erased pencil line along the test piece’s straight edge. At the parallel position to the pencil line, set the rip fence.
Make a resaw cut of short size. Create a straightedge opposite the board’s resawn face. Create a bowed cut by leading the teeth to another side of the wood. Don’t forget to twist the blade and making its sawing way out of vertical.
Make the fence match the way twisted by the blade. In case the blade turns left, slightly adjust the far end of the fence to the right. Similarly, when the blade turns right, slightly adjust the far end of the fence to the left.
6. Make an appropriate feeding rate
To make a smooth surface, try to make a moderate feeding speed (not too fast, and suitably slow) with consistent pace.
7. Always keep a clean blade
Try to maintain a habit of cleaning the blade so that it will always work well and effectively.
8. Be careful when resawing
Remember to attach your fingers. You can also use a push block instead of pushing toward the blade with your strength.
Tip 1: Select a RIGHT BLADE
A 3-4 tpi (teeth per inch) with gullets of the large size is highly recommended for its creating the quietest and smoothest resaw blade.
Tip 2: Maintain a suitable blade tension
To keep stock centered, it is important to make an appropriate blade tension. On the saw, install a blade of Wood Slicer. To prevent the bearings from contacting the blade, thrust them opened up and back off not only above but also below the table.
With the unplugged saw, between the lower and upper wheels, start cranking on some tension, give a poke of sharp sideways on the blade at about a half of the way by the index finger. On the upper wheel, track the blade to make the gullet’s deepest part focus at the tire centerline.
Tip 3: Get the blade guides adjusted
Get the covers of wheel closed, get the saw plugged in, and turn the saw on. Adjust the speed at a full rate to make the blade track perfectly.
In case the blade is blurred by the vibration, slightly decrease or increase the tension to make the blade smoothly operate in a quiet and straight line. Similarly, you can make the cuts smoother and help the saw operate more effectively by eliminating the fluttering process in the kerf.
Get the thrust bearings and lateral guides nearer to the blade.
Tip 4: Using a point block to get your workpiece steered
A point block fence is encouraged to use when there is only 1 or 2 pieces being resawed. Concretely, a curved fence of appropriate height can make the stock upright while the direction of feed is left by hand.
On the stock, make a cut line long enough, get the point to block to achieve your desired width.
Remember to adjust the direction of feed when you freehanding the cut.
5. Get the fence adjusted
In case you resaw 3 or more pieces, make a straight fence and predictable and accurate cuts.On the sawtable, draw an easily erased pencil line along the test piece’s straight edge. At the parallel position to the pencil line, set the rip fence.
Make a resaw cut of short size. Create a straightedge opposite the board’s resawn face. Create a bowed cut by leading the teeth to another side of the wood. Don’t forget to twist the blade and making its sawing way out of vertical.
Make the fence match the way twisted by the blade. In case the blade turns left, slightly adjust the far end of the fence to the right. Similarly, when the blade turns right, slightly adjust the far end of the fence to the left.
6. Make an appropriate feeding rate
To make a smooth surface, try to make a moderate feeding speed (not too fast, and suitably slow) with consistent pace.
7. Always keep a clean blade
Try to maintain a habit of cleaning the blade so that it will always work well and effectively.
8. Be careful when resawing
Remember to attach your fingers. You can also use a push block instead of pushing toward the blade with your strength.
Adjusting Your Band Saw Blade For Blade Drift

There is a blatant truth that there is no band saw which is precisely parallel with its fence. Commonly, it drifts a bit left or right but this doesn’t reflect the blade’s quality. However, you can use a trick to “adjust” it if you are not happy to have drifted blades. In fact, the trick for this is not to adjust the blades, but the fence. The below instruction may be helpful to you. It is arranged step by step to make everything clearly comprehensible. But first of all, you need to prepare some materials and tools:
Step One – Begin with taking a board which is about 20″ in length then use pencil to draw a line straight with the length. You should be careful because this line have to be parallel with the board’s edge. The most suitable distance from the edge is about an inch.
Step Two – Now set up the bandsaw and start cutting that board. Keep it in mind that you should follow the drawn line as exactly as possible.
Step Three – Your board has been cut halfway through, then you stop there. There is your angle.
Step Four – Next, you have to trace the edges of the board. A pencil is recommended to help with this.
Step Five – When you come to this stage, it means you nearly finish the procedure. Alter the fence as long as it matches the line that you have drawn on the band saw table. Now your fence is more properly aligned to cut perfectly straight with the available blades setup.
Step Six – At last, lock that fence adjustment in position and make sure the fence still matches the angle finder blade. If they match, your business is done. Otherwise, you have to repeat the adjusting process until it yields a satisfactory result.
- Round Head Machine Screws – 2pcs – ¼” x 20 x 1 ½”
- Flat Washers – 2 pcs – ¼” flat washers
- Dowel – 3/8” approximately 4” long
Step One – Begin with taking a board which is about 20″ in length then use pencil to draw a line straight with the length. You should be careful because this line have to be parallel with the board’s edge. The most suitable distance from the edge is about an inch.
Step Two – Now set up the bandsaw and start cutting that board. Keep it in mind that you should follow the drawn line as exactly as possible.
Step Three – Your board has been cut halfway through, then you stop there. There is your angle.
Step Four – Next, you have to trace the edges of the board. A pencil is recommended to help with this.
Step Five – When you come to this stage, it means you nearly finish the procedure. Alter the fence as long as it matches the line that you have drawn on the band saw table. Now your fence is more properly aligned to cut perfectly straight with the available blades setup.
Step Six – At last, lock that fence adjustment in position and make sure the fence still matches the angle finder blade. If they match, your business is done. Otherwise, you have to repeat the adjusting process until it yields a satisfactory result.
